

Precision Lawn Care: Understanding Your Westland Spreader Settings
- by Fitfit Garden

We’ve all seen it: a lawn that looks patchy, with some areas bright green and others looking burnt or yellow. This is almost always caused by uneven distribution of fertilizer or seed. If you own a Westland spreader, the secret to a professional-looking lawn lies in mastering your Westland spreader settings.
Why Settings Matter
Every product has a different "flow rate." Fertilizer granules are heavy and round, while grass seeds are light and oddly shaped. If your setting is too high, you risk "burning" the grass with an overdose of nitrogen. If it’s too low, you won't see any results at all.
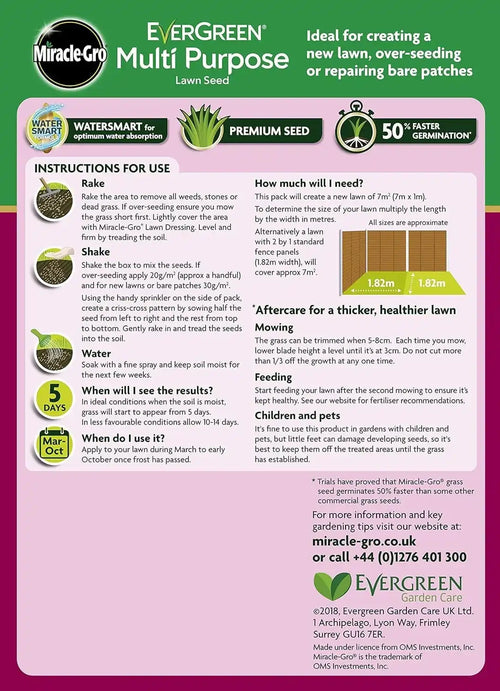
How to Find the Right Number
Most Westland products will list a specific setting number on the back of the bag (usually ranging from 1 to 10). However, your walking speed also affects how much is dropped.
-
The Calibration Test: Put a small amount of product in the hopper and walk a measured 10-meter line. Check if the amount used matches the coverage promised on the bag.
-
Overlap Technique: To avoid "striping," it’s often better to use a slightly lower setting and go over the lawn twice in a cross-hatch pattern (once horizontally, then vertically).

